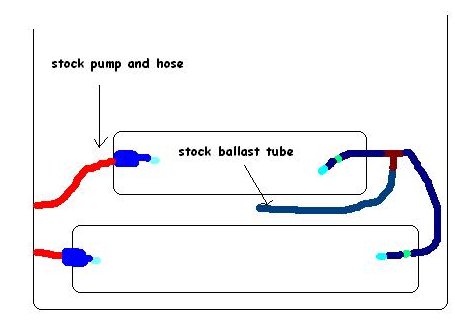
The following project was done for a �01 Moomba Mobius but this should work for most direct drives. What I did was add a rear 750 lb. fat sack to the rear storage compartment. I cut no ballast tubes so everything can be put back like it originally was. Here is a rough drawing of what the ballast system is.
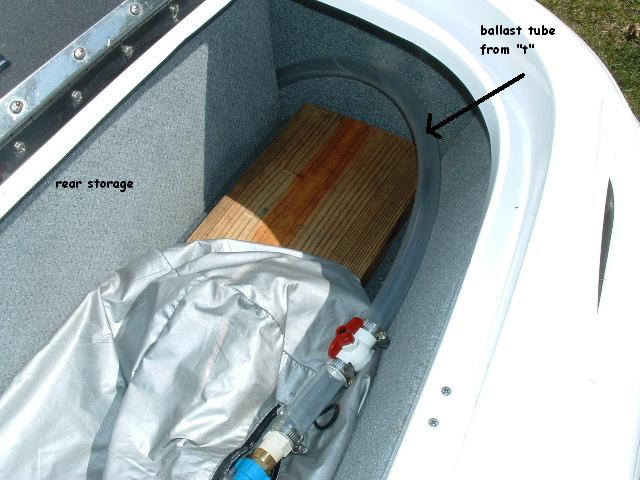
The top sack is the stock fat sack that came with the boat under the rear seat. The dark blue tubing is 1� ID tubing. The green dots are 1/2� PVC ball valves. The dark red �T� is a 1/2� PVC tee. The light blue are blue magic fat sack or waterbed fittings. The bottom sack is the 750 lb. fat sack I put in the rear storage locker. The stock ballast tube comes up through a hole under the rear seat. It runs under the boats floor to an intake pump. The blue in the drawing are fat sack pumps for pumping water out of the boat. The red lines are 3/4� ID tubing. For the Moomba Mobius, it is suggested to put no more than 100 lbs of gear in the rear storage trunk. The gas tank is directly under this and heavy weights can hurt the gas tank and cause your boat to have electrical problems. We bought a 64� 2 X 8 treated board for the fat sack to rest on. We treated it again with a deck water sealer and put it in the rear locker. It is supported on both ends and down not put any pressure on the gas tank. We chose thicker wood so that it would not flex as much. I would check with your boat manufacturer to see what weight limits are in your rear trunk.
Steps:
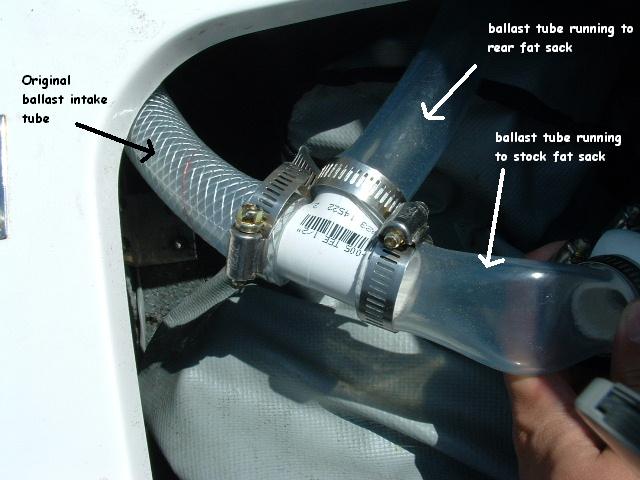
1. The first thing I did is disconnect the stock ballast tube from the fat sack fitting. I then put a 1/2� PVC tee into the line and ran 1� tubing out of both ends of the tee. I put 1/2� ball valves in these two lines running from both fat sacks.
2. To connect the stock fat sack I put the stock adaptor into the hose and screwed on the blue magic fitting which goes into the fat sack.
I had to buy a 1/2� PVC male adaptor for the rear sack and a brass fitting that the blue magic adaptor goes on to.
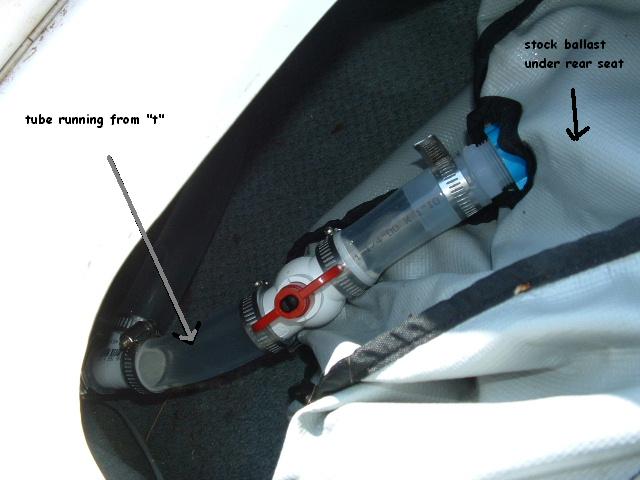
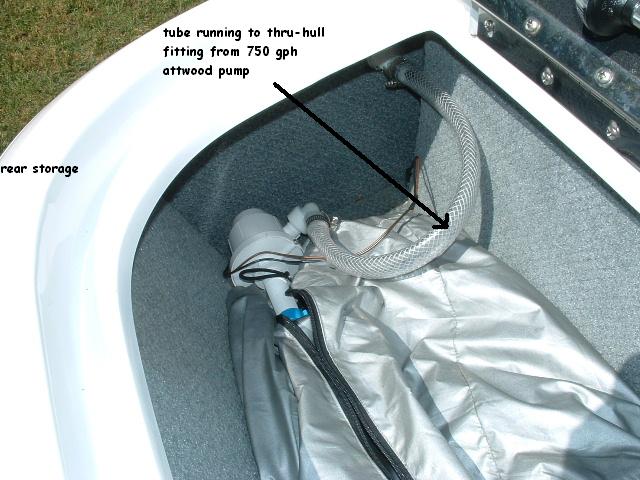
3. The stock ballast under the rear seat already came with a pump for emptying so I had to do nothing there. For the 750 lb. sack, I bought a 750 gph Attwood aerator pump. I bought some 3/4� ID tubing which goes on the aerator pump.
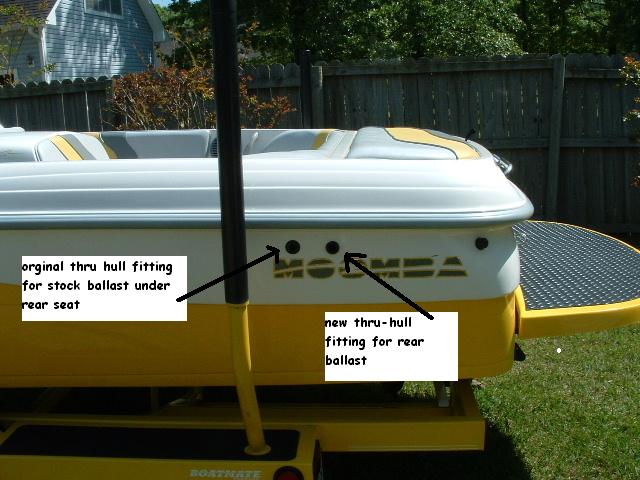
4. I then had to drill a hole in the boat for a thru-hull fitting. I called Moomba and talked to them about doing this. They gave me directions to drilling the hole in the fiberglass. I would contact your boat company before doing this. I used a 1� hole saw for drilling. First, I found a spot where I wanted the new thru-hull fitting to be. I drilled a very small hole from the inside of the boat. That gave me a reference point. I then took the hole saw and drilled from the outside into the fiberglass. Once you start drilling, keep on until you are all the way through.
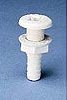
Here is the original 3/4� thru-hull fitting I bought from West Marine. I painted it black to match the stock thru-hull fitting. (Note: only paint the outside �mushroom� part. If you paint the whole thing, you will have trouble screwing the backing on.) I used fiberglass glue to caulk the fitting on the outside of the hull. I picked this up at West Marine also. There are many different brands. Allow time to dry.
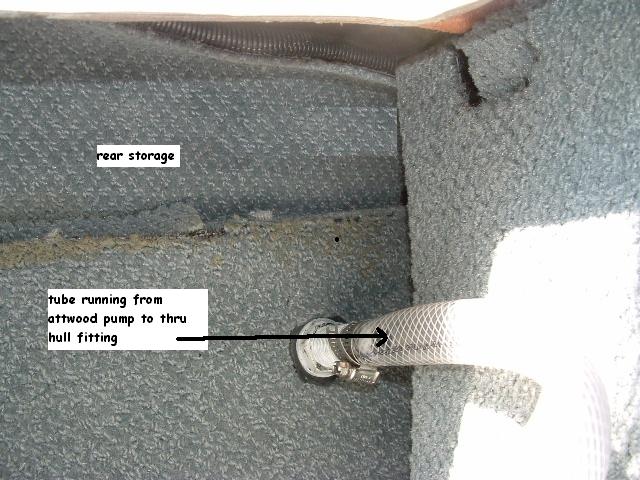
5. I then connected the hose from the aerator pump to the new thru hull fitting.
6. I then wired the new aerator pump to an accessory switch on the dash panel. I used 16 gauge wire and ran the wires under the sides of the walls, totally out of view. There should be a lot of wires running in the same place. I clamped all of these wires together.
7. After all of this, I clamped all of the tubing on the connections really tight so that a tube will not pop off or leak.
To fill the ballast system, I simply turn on the fill switch on my dash and make sure one of the ball valves are open. When that sack is full, open the other valve and close the valve to which goes to the full sack. When all that sack is full, close the valve. When I want to empty the sacks, I simply turn on my stock empty switch along with the accessory switch that the aerator pump is wired to. The entire ballast system fills in about 5 minutes and empties in 7.
All of the materials used in the project totaled around $50. I bought all pvc valves & fittings, the 16 gauge wire, and the 3/4� ID and 1� ID tubing from a local hardware store. The aerator pump can be bought at Wal-Mart for $18. The thru-hull fitting and fiberglass glue was bought at West Marine. You will need around 15 clamps for the project. They can also be bought at any hardware store.
If you choose to do this project, I am not responsible for any damages to your boat, equipment or any other of your belongings. You will be doing this at your own risk. I have used this completed ballast system and it has not failed on me once. If you have any questions or need any further details, please contact me atwakeboarder@ezclick.net.