The total cost of this housing cost me about $50. I got almost all of my parts at Chase Pickens. You will have to get your PVC at a plumbing store. Below you will see the list of the materials needed, as well as a few pictures, that you will need in order to complete the project. Once you have your surplies in hand, follow the steps I list and you will soon have a waterproof housing for you camera to capture all of your best tricks up close and personal.
Materials Needed
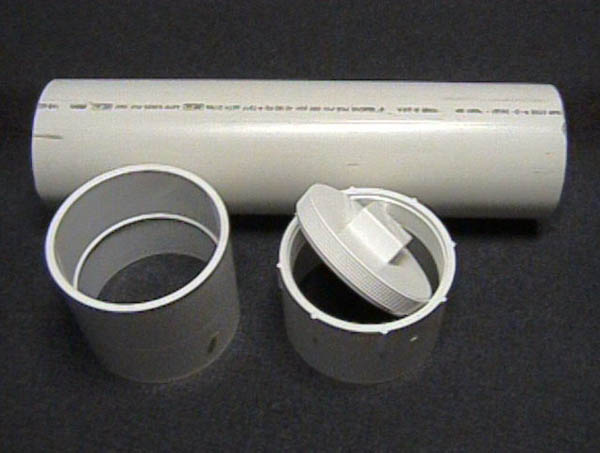
6" PVC 6 inches longer than your camcorder
6" PVC Cup link/coupler
6" PVC Cup link/coupler with threads on one side
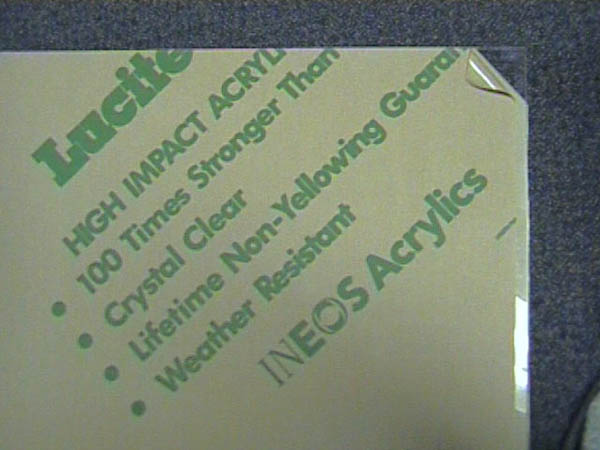
Double Thick Plexiglas 10x24
Standard piece of glass cut to fit inside regular 6" cup link/coupler
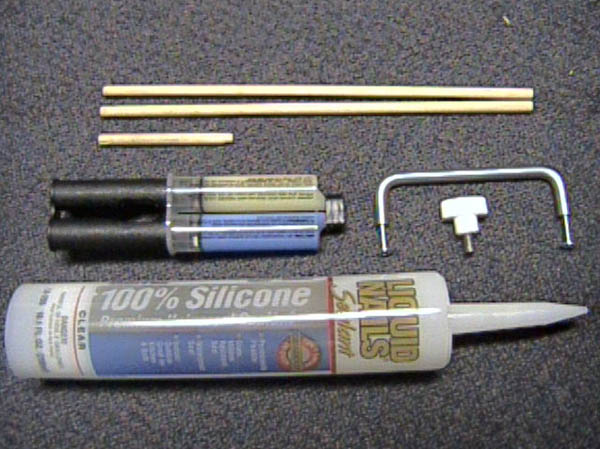
Plastic welder 2 part epoxy
3 standard 3 inch drawer handles
�" wooden dowel around 3 feet long
PVC Cement
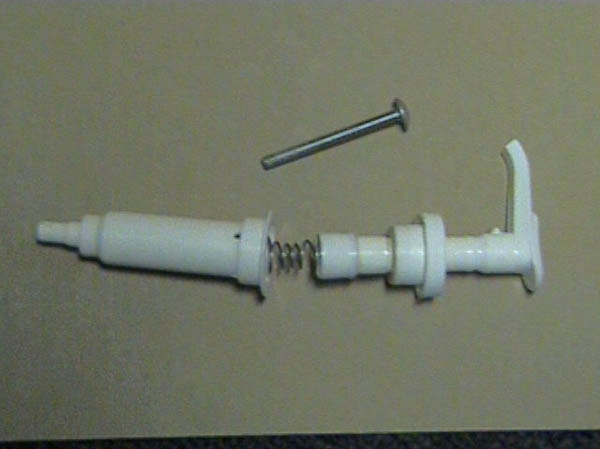
Spring loaded hand soap pump (see procedure, picture)
Bolt/ Nail/ Screw that fits through the spring inside the soap pump
Silicone sealer
Binding thumb screw
Procedure
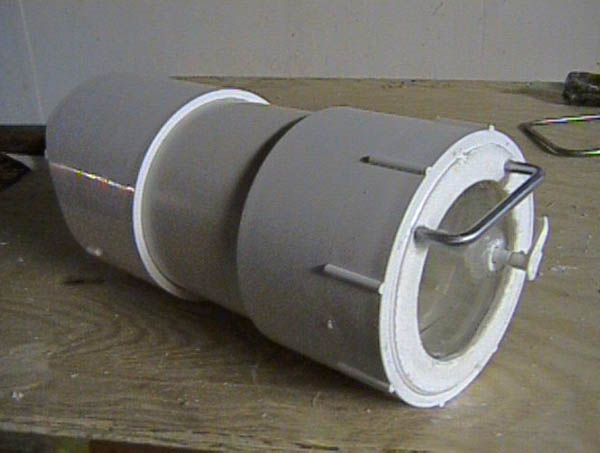
Start off by cutting your piece of PVC 6" longer than your camcorder. Try to keep the cutting as smooth and square as possible.
Now you have to make your tray for the camcorder to sit on. Cut a piece of Plexiglas approximately 4" wide. It all depends on the height of your camcorder. You need the tray to be able to slide in without the top of the camcorder touching. Cut about 1-3'' longer than the length of the PVC. The reason for this is because the threaded plug does not completely thread into the PVC tubing. It stops about half way into the threaded cup link/coupler. You want the threaded plug to screw in and put a small amount of pressure on the tray to keep it from sliding around and moving. Cut the length precisely later in the procedure.
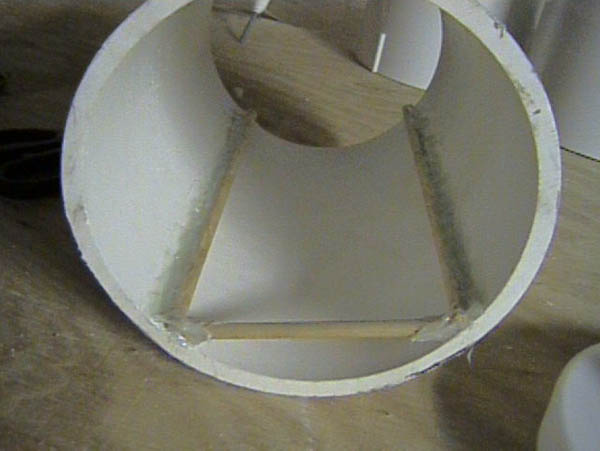
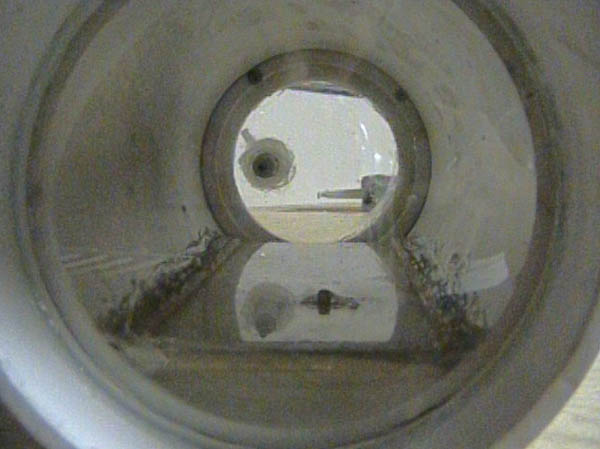
Now you make the guide rails for the tray. Cut off 2 pieces of Dowel equal in length and equal to the length of the PVC tubing. Wrap the tray in plastic wrap to keep the epoxy glue off your tray. Set your tray inside the PVC and lay the dowel on top off your tray. Glue the dowel to the sides of the PVC tubing walls using your 2-part epoxy. Let them dry for about 15-20 minutes. Carefully slide the tray out and try not to move the dowel. If the tray is too tight and will not fit, sand down edges of the tray until it fits tight. If the tray is loose and wobbles, add more epoxy to the rails and let it dry. Repeat this if it is still loose until you have a snug fit. Next, cut off a piece of dowel that will fit under the two guide-rails. This piece is to stop the tray from hitting the objective lens. Epoxy this to the tubing and other 2 rails.
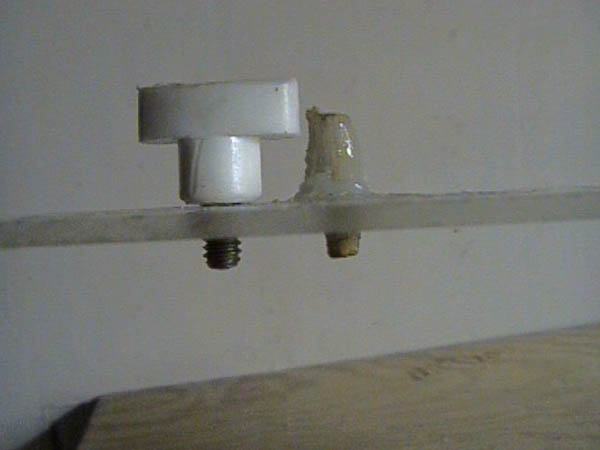
Once you have you cut your tray you have to put the camera-attaching device. You should center the camcorder on the tray. Then look at the bottom of the camcorder through the clear Plexiglas. Scratch on the tray with a razor or something to show you where the tripod holes line up. Figure out how big the wholes are and drill through the tray where you have marked them (there should be 2 marks). Take about 1/2" of dowel and put it in the hole (you will have to sand it down to get the right fit).
Set the camcorder on the tray and put the dowel through one hole and into the camcorder (there should be a hole with no threads on it). Make sure the camcorder is level and mark the dowel should be glued in the hole. A little extra dowel hanging out of the non-camcorder side is not a problem.
Use epoxy to glue this into place. The other hole is where you would use your bindings screw to fasten the camcorder. The dowel does not move in and out of the whole. It is just there to keep the camcorder from spinning. The binding bolt is removable. It keeps the camcorder from sliding off the dowel. Cutting down the dowel below the grips on the thumbscrew works better because you can easily screw and unscrew the bolt without the dowel getting in the way.
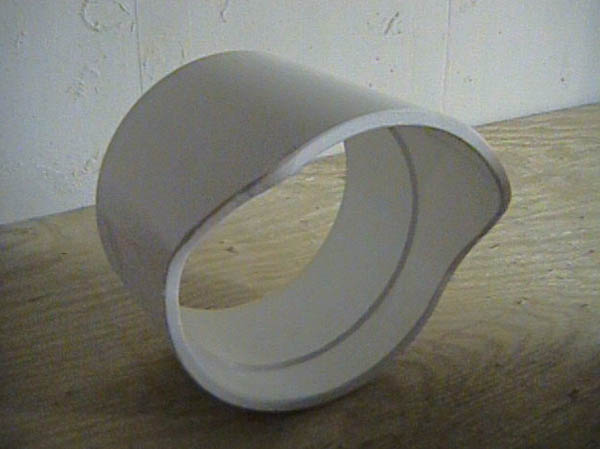
Next take a regular cup link/coupler and get a piece of glass cut to fit inside the PVC. You want it small enough to fit into the cup link/coupler, but not too big that it will go past the rib in the middle if the cup link/coupler. You want the glass to hit right on this rib. Next, glue your glass with silicon sealer to this rib. Make sure everything is water/air tight. If it is not, the housing will leak. When this is finished use PVC glue to glue it to one end of your PVC tube. You can cut off part of the end of the cup link/coupler to make a sunshield.
Almost There!
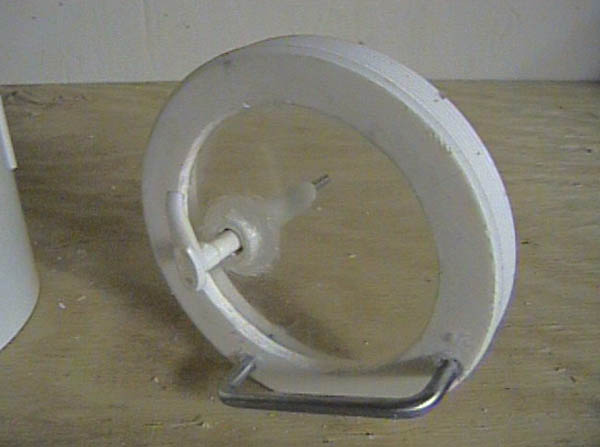
Now you are going to construct the part of the housing that opens and closes. Take the plug for the cup link/coupler draw a circle around the square of the plug. You want to have about �'' from the side of the plug. Next, cut this circle out. It does not have to be precise because this is going to be your view into the housing. Now, cut a piece of your left over Plexiglas that will cover this hole up. It should fit pretty close to the top and edges of the threaded plug. Seal this up with silicon sealer. Again, make sure it is water/air tight otherwise it will leak. Glue this cup link/coupler to the other end of your PVC housing using PVC glue. The clear view is to see how your camcorder is and where the view is pointed.
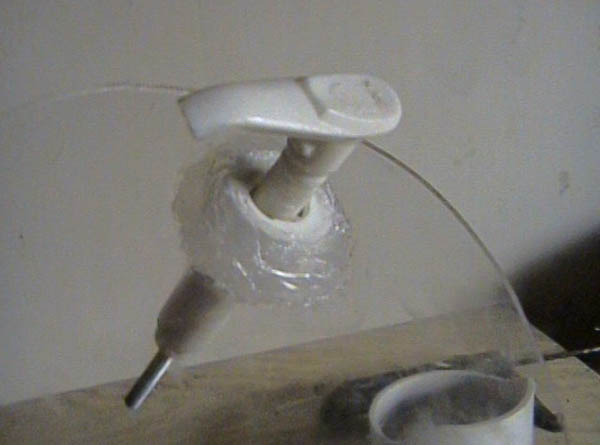
Now it is time to make the most important part of the housing, the start and stop recording button. The most important piece is the soap pump. I got mine from my bathroom. First, cut off the straw type thing on the pump (not completely though). You need a pump that is spring loaded. You should be able to pull the pump apart to get at the spring. You will see some gaskets, which seal the pump internally. You need a bolt/nail/screw that is long enough to be pushed by the pump and hit the record button. This bolt also needs to be able to fit through the spring and through the end of the pump.
Now that the button is ready, you have to mount it to your camcorder. First though, you have to realize where it needs to be to hit the record button. You must screw the PVC plug all the way in and then mark where the button should go. Look through the Plexiglas and line up where the record button is and mark this on the Plexiglas. Then estimate how far the record button is in. You need a bolt that will come close to the record button, but not touch it. Take into consideration that the bolt will be inside the soap pump and mounted on the glass. It should be mounted on the Plexiglas or you should be able to see it to make sure it is functioning properly.
Cut a whole in the Plexiglas about the size of the pump. Clamp each half over the PVC hole. Seal it up with silicone sealer. MAKE SURE YOU FILL IN THE HOLE OF THE SOAP DISPENSER, otherwise water will come through the hole and into the housing. Another note: I put 2-part epoxy over the silicone sealer to make it sturdier. This way all of the pressure would not be resting on the plexi-glass.
The last steps are to paint it (if you want) and to mount the handles. You mount the side handles last so you make sure they are level with the view. Mount them on opposite sides of the camcorder and seal them up with silicone. These are your grips for recording. Mount your last handle ON THE PVC THREADED PLUG, NOT THE PLEXIGLAS. You do not want to put unwanted stress on the Plexiglas, so you mount it on the PVC. Seal this up with silicone sealer. This handle will be used to screw and unscrew the plug to put you camcorder in and out.
You are finally done. Test out the housing first with nothing in it and make sure water does not just pour into any loose fittings or unsealed holes.